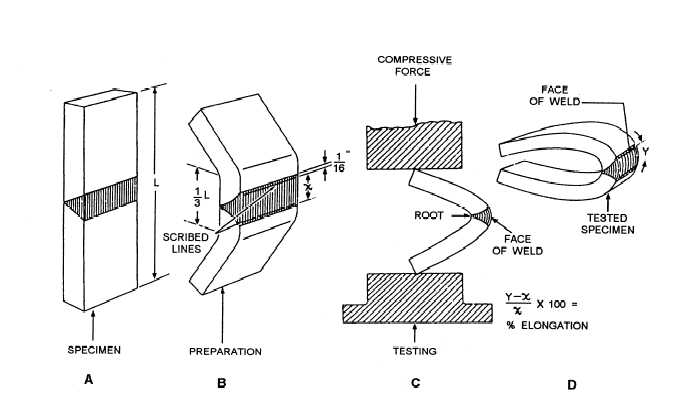
Figure 7-61.-Free-bend test

Figure 7-62.-Guided-bend test jig.
1/16 inch from each edge of the weld metal, as shown in figure 7-61, view B. Measure the distance, in inches, between the lines to the nearest 0.01 inch and let the resulting measurement equal (x). Then bend the ends of the test specimen until each leg forms an angle of 30 degrees to the original centerline.
With the scribed lines on the outside and the piece placed so all the bending occurs in the weld, bend the
Continue Reading