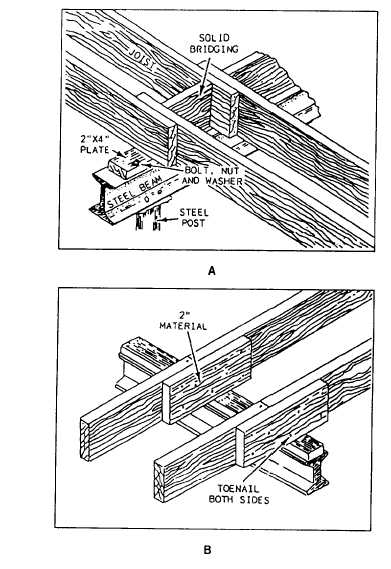
Figure 1-25.—Joists supported by S-beam using wooden blocks.
construction. Figure 1-25 shows the lapped (view A) and
butt (view B) methods of framing over girders.
Bridging between Joists
Floor plans or specifications usually call for
bridging between joists. Bridging holds the joists in line
and helps distribute the load carried by the floor unit. It
is usually required when the joist spans are more than 8
feet. Joists spanning between 8 and 15 feet need one row
of bridging at the center of the span. For longer spans,
two rows of bridging spaced 6 feet apart are required.
CROSS BRIDGING.— Also known as
herringbone bridging, cross bridging usually consists of
1- by 3-inch or 2- by 3-inch wood. It is installed as
shown in figure 1-26. Cross bridging is toenailed at each
Figure 1-26.—Wood cross bridging.
end with 6d or 8d nails. Pieces are usually precut on a
radial-arm saw. Nails are started at each end before the
cross bridging is placed between the joists. The usual
procedure is to fasten only the top end of the cross
bridging. The nails at the bottom end are not driven in
until the subfloor has been placed. Otherwise the joist
could be pushed out of line when the bridging is nailed
in.
An efficient method for initial placement of cross
bridging is shown in figure 1-26. In step 1, snap a chalk
line where the bridging is to be nailed between the joists.
In step 2, moving in one direction, stagger and nail the
1-12