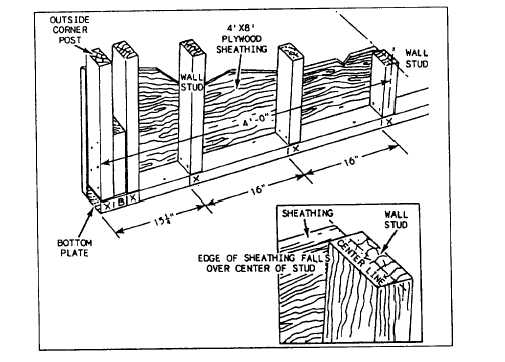
Figure 1-40.—First exterior wall stud layout.
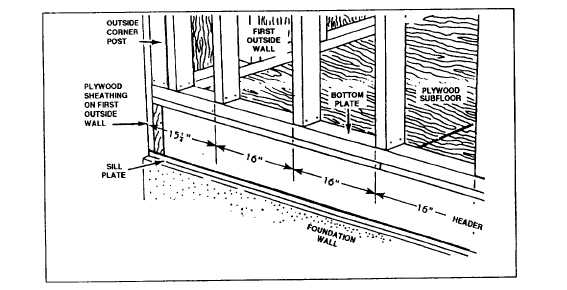
Figure 1-41.—Second exterior wall stud layout.
Horizontal Plate Layout
After all the lines are snapped, the wall plates are
cut and tacked next to the lines (fig. 1-38). The plates
are then marked off for corner posts and regular studs,
as well as for the studs, trimmers, and cripples for the
rough openings. All framing members must be clearly
marked on the plates. This allows for efficient and
error-free framing. Figure 1-37 shows a wall with
framing members nailed in place according to layout
markings.
A procedure for marking outside and inside comers
for stud-and-block corner post construction is shown in
figure 1-39. For laying out studs for the first exterior
wall, see figure 1-40. In figure 1-40, the plates are
marked for the first stud from a corner to be placed 15
1/4 inches from the end of the turner. Studs after the first
stud follow 16 inches OC layout. This ensures the edges
of standard-size panels used for sheathing or wallboard
fall on the centers of the studs. Cripples are laid out to
follow the layout of the studs.
A procedure for laying out studs for the second
exterior wall is shown in figure 1-41. The plates are
1-23