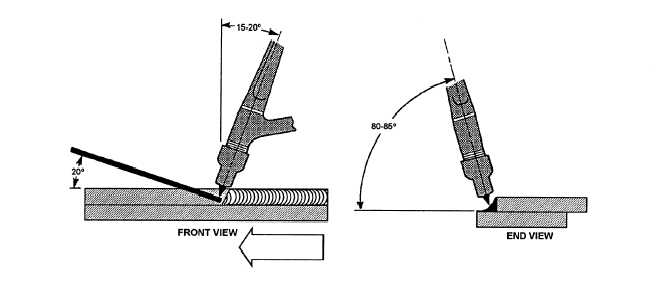
Figure 8-17. - GTA welding a tee joint.
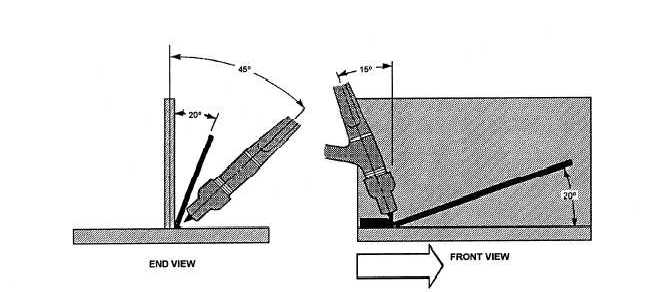
Figure 8-18. - GTA welding a lap joint.
filler rod and bring the arc back to the front edge of the puddle. When the puddle becomes bright and fluid again, you should repeat the steps as described before. Figure 8-16 shows the correct procedures for adding filler metal. Continue this sequence until the weld joint has been completed. The width and height of the weld bead is determined by the speed of travel, by the movement of the torch, and by the amount of filler metal added.
In welding practice, it is again stressed that good (GTA welding depends on following this definite procedure-form the molten pool and then feed filler rod intermittently to the leading edge of the pool as you move the torch forward. DO NOT feed the filler rod into the arc. You should practice making single-pass butt welds until you can produce satisfactory welds.
LAP AND TEE JOINTS. - In chapter 3, we said that lap and tee joints are welded using the fillet weld. Fillet welds are slightly awkward to make using the GTA welding process because of the gas nozzle. Once you establish the arc, you should pay close attention to the molten puddle. Figures 8-17 and 8-18 show the correct torch and rod angles for the tee and lap joints.
In welding a tee or lap joint, the puddle forms a V-shape. The center of the V is called a
notch, and the speed at which you fill the notch governs how fast you should move the torch. Do NOT get ahead of the notch. If you do, the joint will have insufficient fusion and penetration. As you weld along the joint, dip the rod in
Continue Reading