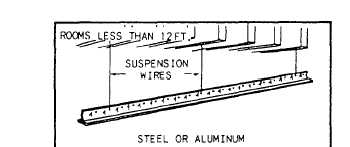
Figure 5-22.—Main tee suspension and steel splice.
MAIN TEES.— Install maintees of 12 feet or less
by resting the ends on opposite wall angles and inserting
the suspension wires (top view of fig. 5-22). Hang one
wire near the middle of the main tee, level and adjust the
wire length, then secure all wires by making the
necessary turns in the wire.
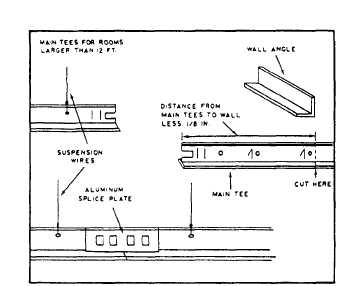
For main tees over 12 feet, cut them so the cross tees
do not intersect the main tee at a splice joint. Begin the
installation by resting the cut end on the wall angle and
attaching the suspension wire closest to the opposite
end. Attach the remaining suspension wires, making
sure the main tee is level before securing. The remaining
tees are installed by making the necessary splices (steel
splices are shown in fig. 5-22 and those for aluminum
in 5-23) and resting the end on the opposite wall angle.
After the main tees are installed, leveled, and secured,
install the cross tees.
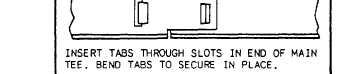
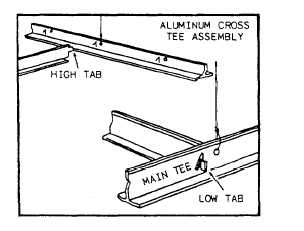
CROSS TEES.— Aluminum cross tees have
“high” and ‘low” tab ends that provide easy positive
installation without tools. Installation begins by cutting
border tees (when necessary) to fit between the first
main tee and the wall angle. Cut off the high tab end and
rest this end in the main tee slot. Repeat this procedure
until all border tees are installed on one side of the room.
Continue across the room, installing the remaining cross
tees according to your grid pattern layout. An aluminum
cross tee assembly is shown in figure 5-24. At the
opposite wall angle, cut off the low tab of the border tee
Figure 5-23.—Main tee and aluminum tee splice.
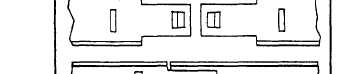
Figure 5-24.—Aluminum cross tee assembly.
and rest the cut end on the wall angle. If the border edge
is less than half the length of the cross tee, use the
remaining portion of the border of the previously cut tee.
Steel cross tees have the same tab on both ends and,
like the aluminum tees, do not require tools for
installation. The procedures used in their installation are
the same as those just described for aluminum. A steel
cross tee assembly is shown in figure 5-25. The final
step after completion of the grid system is the
installation of the acoustical panels.
Acoustical Panels
Panel installation is started by inserting all full
ceiling panels. Border panels should be installed last,
after they have been cut to proper size. To cut a panel,
turn the finish side up, scribe with a sharp utility knife,
and saw with a 12- or 14-point handsaw.
5-18